

How To Use Photo Filters On Iphone
The built-in iPhone camera app is loaded with awesome camera features that can lift your photography above the normal, everyday kind of photography most people produce. In this tutorial, you'll learn about each of the iPhone camera effects so you can use them to improve your iPhone photography.
1. Use 2x Telephoto Zoom To Get Closer To Your Subject
Do you have the iPhone 7 Plus, iPhone 8 Plus, or iPhone X camera? Maybe you have the newer iPhone XS camera or iPhone XS Max camera.
Or perhaps you're planning on getting the latest iPhone 11 Pro or Pro Max.
If you have any one of these iPhone models, you can enjoy the benefit of optical zoom.
That's because these devices have either two or three rear-facing cameras. One of these cameras has a telephoto lens with 2x optical zoom.
With optical zoom, you can bring your subject twice as close without losing any image quality.
To zoom in:
- Open the Camera app and swipe to Photo mode.
- Tap on the 1x button and you will quickly see the 2x view.
- To return to 1x (wide-angle), tap the 2x button.
2. Light Up the Scene Using Flash
Your iPhone camera's flash is perhaps not the most exciting of iPhone camera effects, but it definitely has its place.
If you want to add some light to your image, look for the little lightning bolt icon when you're in the Camera app. You have the choice to turn your Flash to Auto, On, or Off.
The use of Flash will take some experimentation on your part. If you have an iPhone 8 Plus, X, XS, XS Max or XR, you're in luck. They all have a Slow Sync Flash.
Slow Sync Flash means your iPhone takes a photo with a slower-than-normal shutter speed while firing the flash. Because the shutter is open a bit longer, the background is exposed for longer, making it brighter. The flash helps to freeze the subject, but it's still important to have your subject keep fairly still.
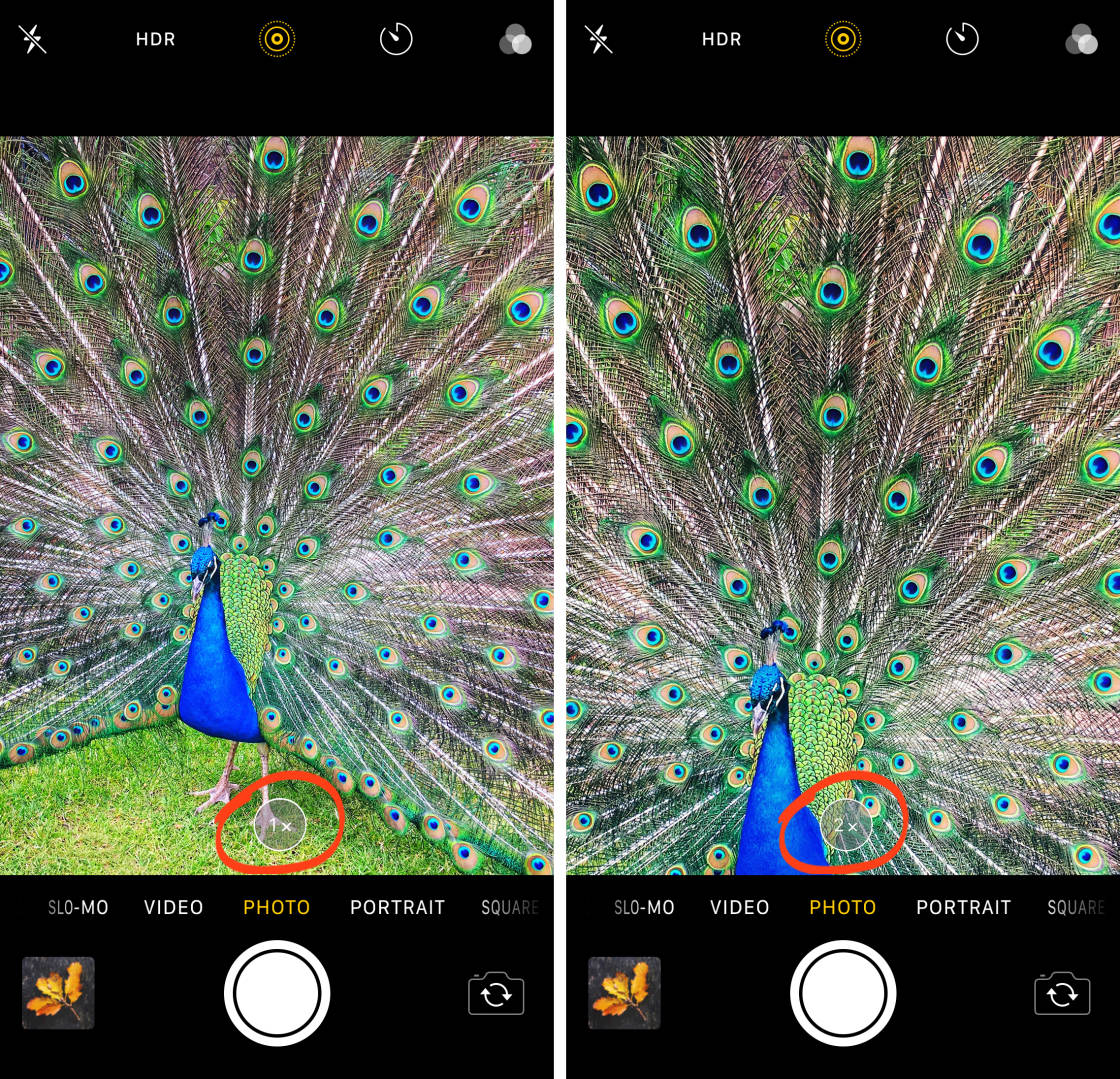
3. Create Long Exposures (And More) With Live Photo iPhone Camera Effects
You can get really creative and have a lot of fun with one of the most powerful iPhone camera effects – Live Photo mode.
It's available to those with an iPhone 6s or later. This option allows you to record the 1.5 seconds before and after you take an image.
So what does that mean for your photos? By having this feature activated, you can see your still images come to life with motion and sound. In essence, you have access to a three-second video, as well as a still photo.
To turn on this feature:
- Open the Camera app.
- Swipe to Photo mode and tap the Live Photo icon. It looks like a target and it will turn yellow when it's on.
- Take a picture.

This is where the fun begins. If you have iOS 11 or later, you can apply a Live Photo effect.
- Open your Photos app and select the Live Photo.
- Swipe up until you see Effects.
- Select from Loop, Bounce, or Long Exposure.
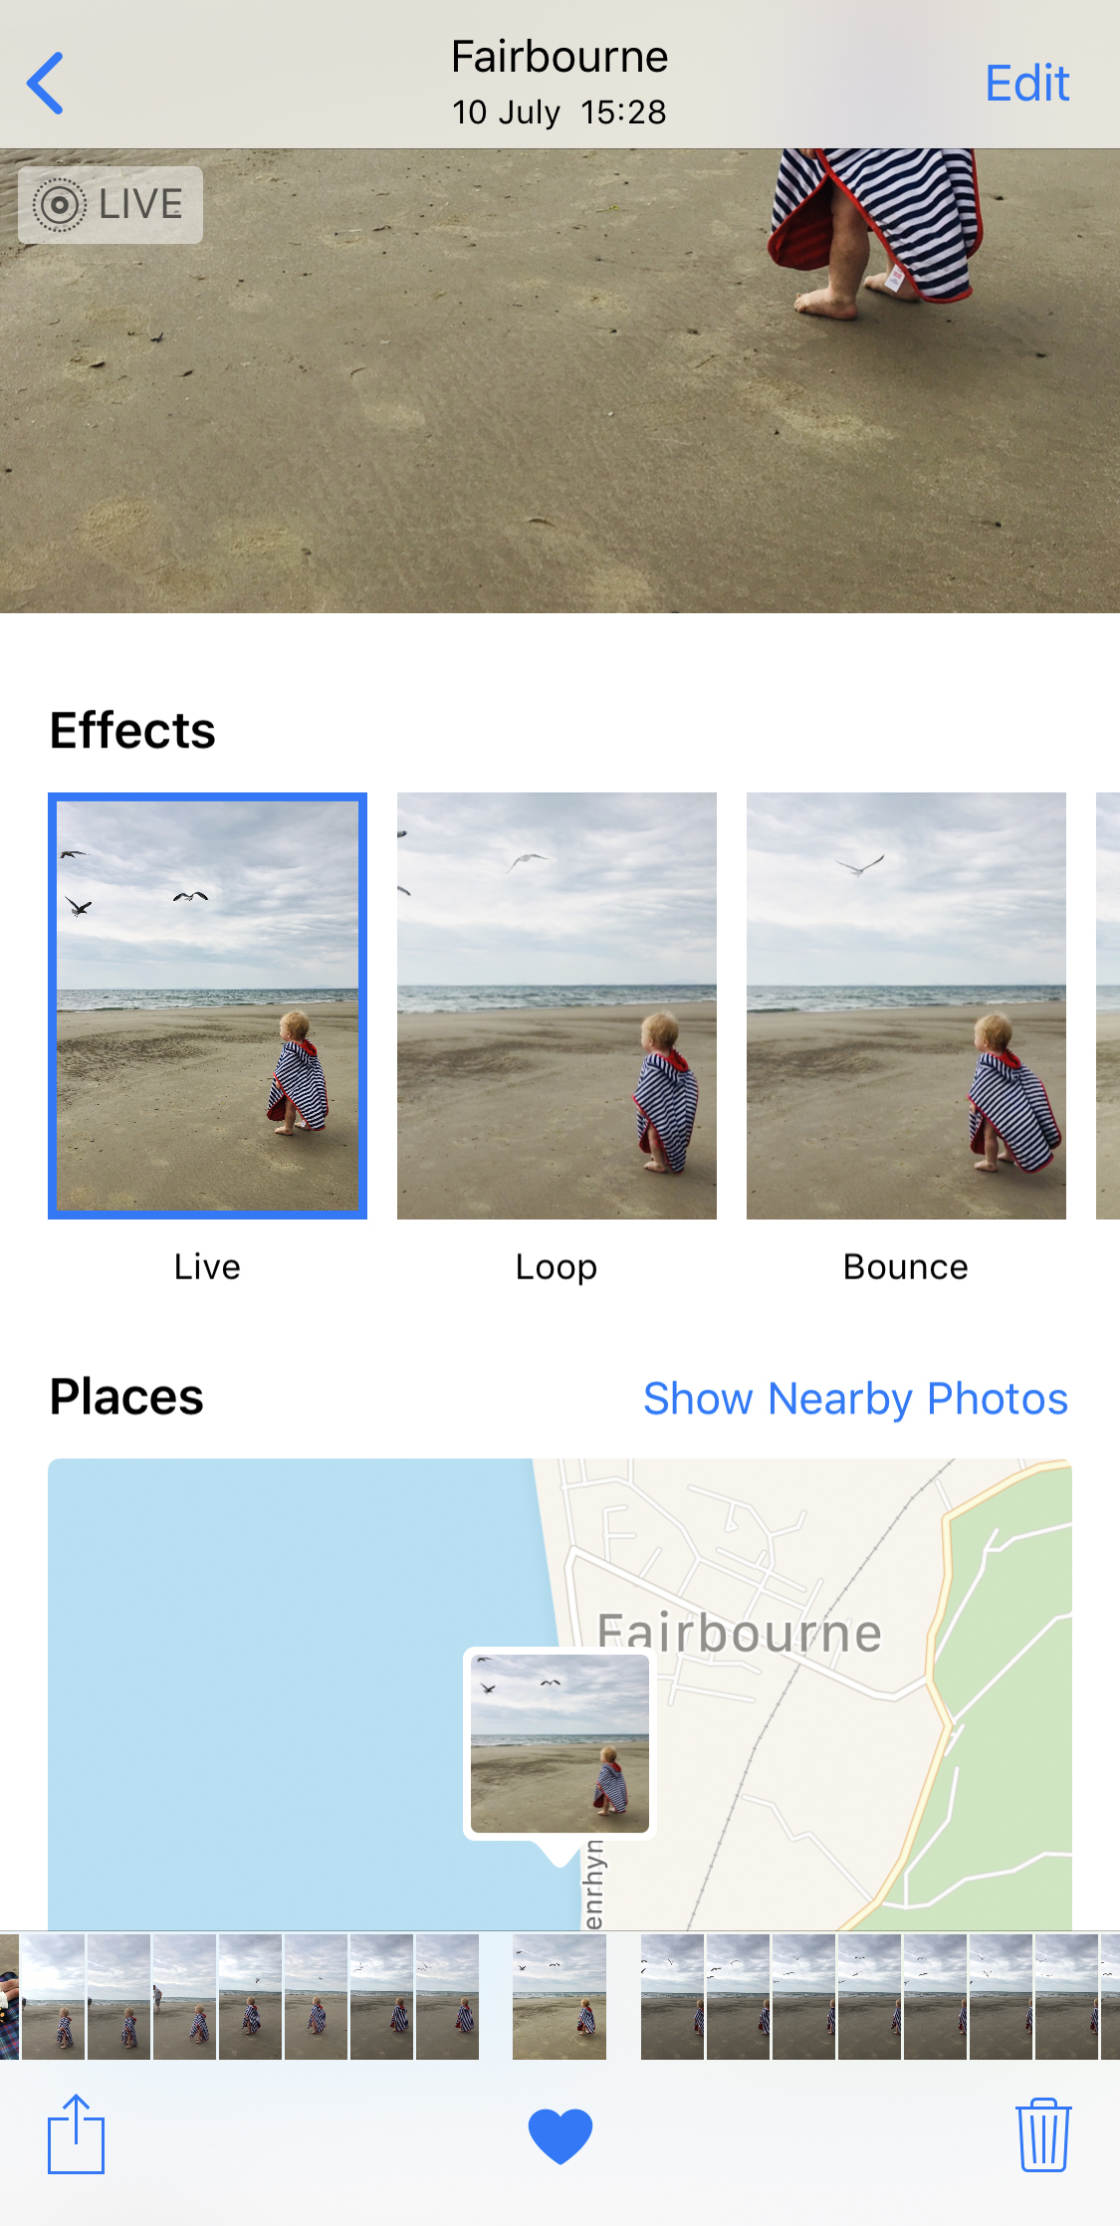
With Loop, as the name suggests, you can turn your Live Photo into a video loop.
Bounce makes your Live Photo move back and forth.
Long Exposure is the most exciting of the Live Photo features.
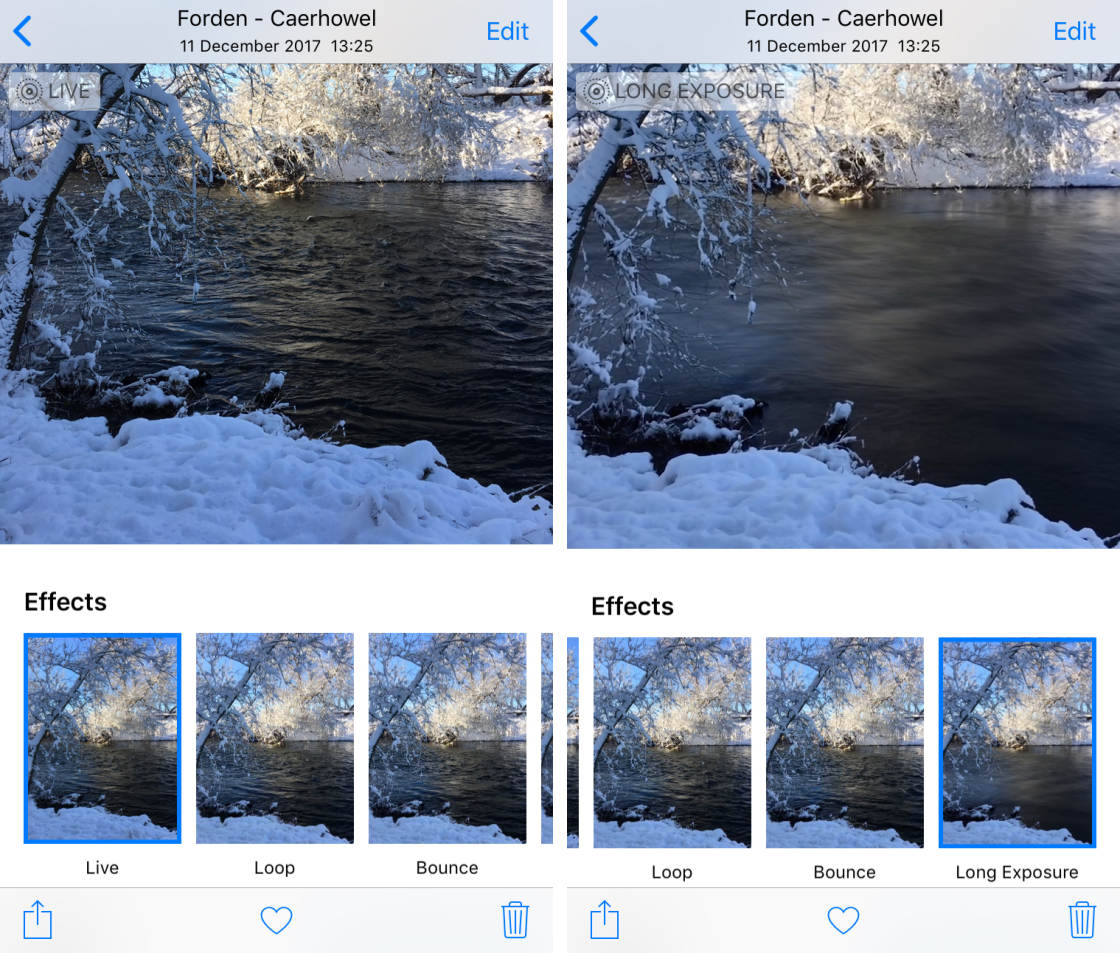
It creates an effect that used to be possible only with a long-exposure app or a DSLR/mirrorless camera.
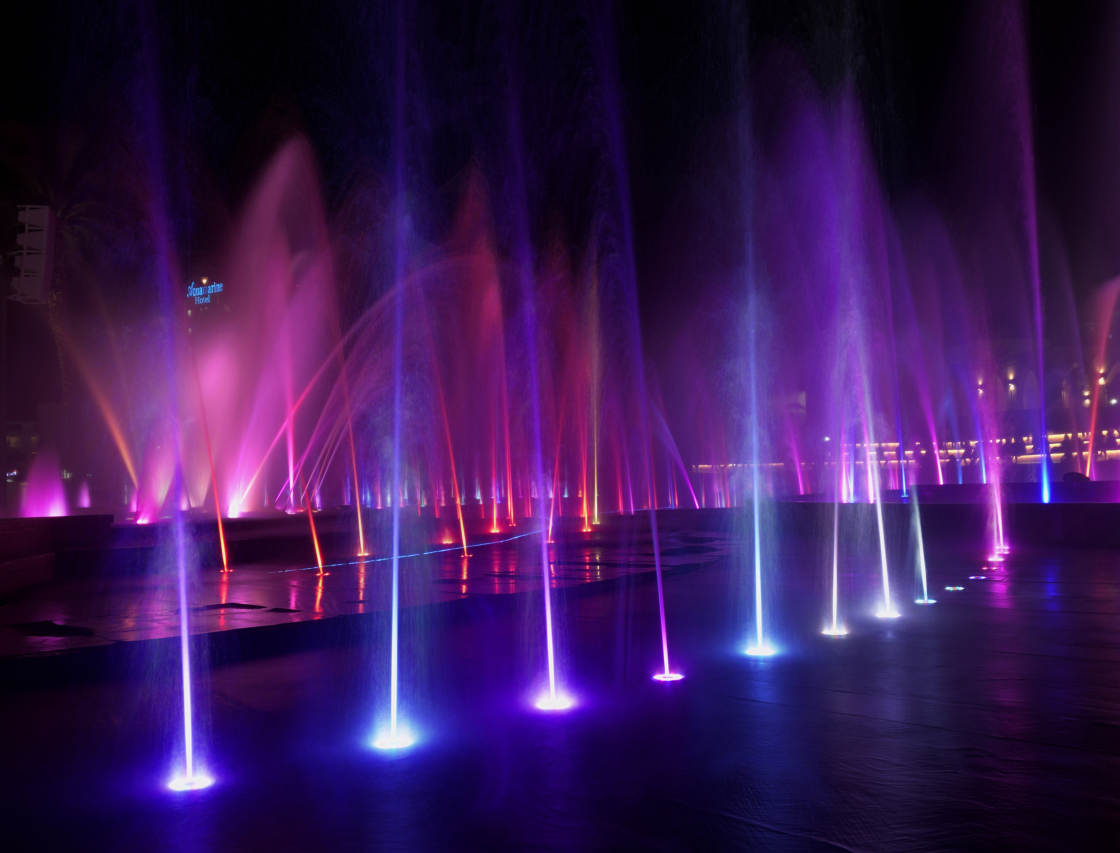
Experiment with traffic at dusk or at night or fireworks in the night sky to capture light trails. Apply it to a waterfall or any body of water to give it that silky smooth appearance.

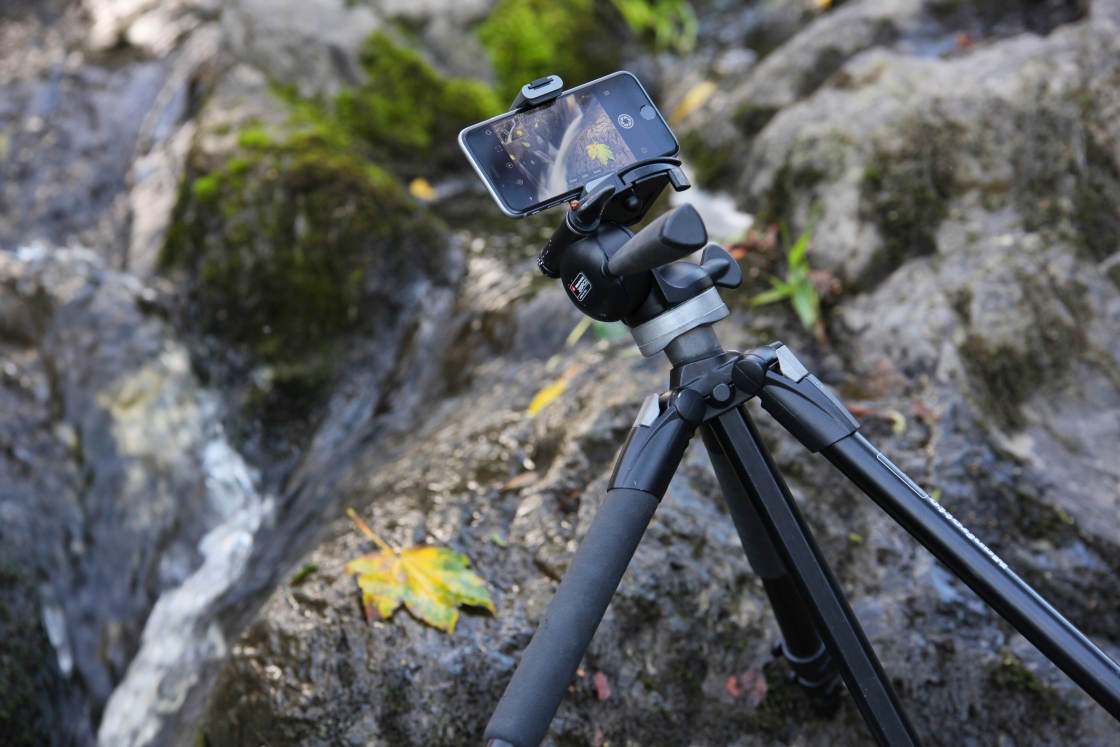
If you want these Live Photo effects to look their best, use an iPhone tripod to keep the camera as steady as possible.
And once you're done, you can share the Live Photo with others! Just make sure to save Live Photo as a video, first.
4. Try A Filter To Change The Mood
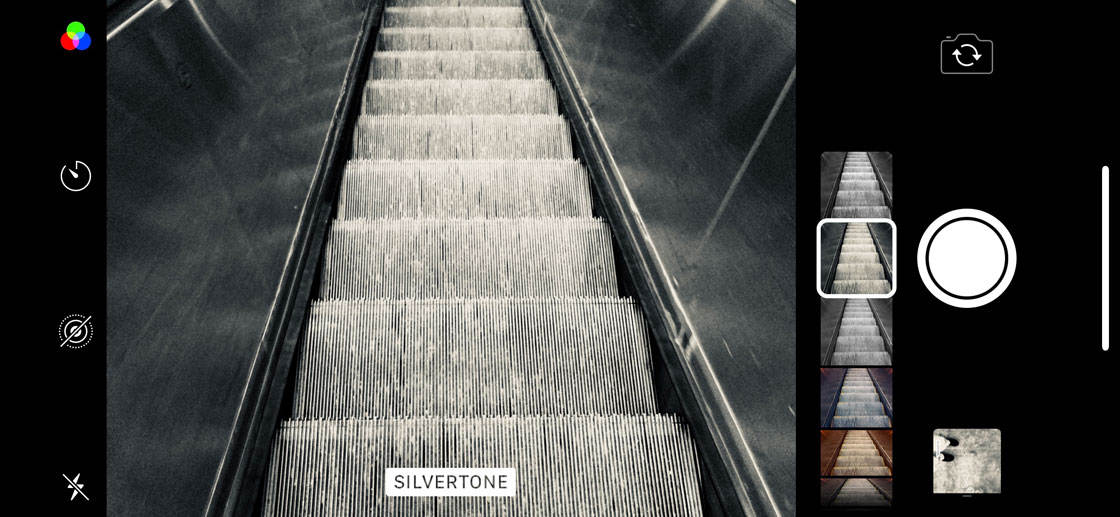
iPhone filters are the most commonly used of the iPhone camera effects. There are a number of filters built into your iPhone camera. You can make subtle changes to your image before you even take the picture.

To get started, launch the Camera app. You'll see three overlapping white circles on your screen. Tap on them to access a number of "looks" you can apply to your image before you shoot. The circles turn red, green, and blue when one of the filters is activated.
You have nine choices that will change the mood of the image. Aside from the obvious Original appearance, you can make your image more vivid, more dramatic, or remove the color altogether with Mono, Silvertone, or Noir.
Ideally, you should shoot without any applied filter. Then, if you want to use one of these filters later, you can do that. However, even if you do shoot with a filter applied, it's good to know that you can remove the filter afterward, or switch to a different filter.
Always remember to use filters sparingly. Concentrate on taking good pictures first, then apply a filter to see if it provides the subtle enhancement or mood you envisioned.
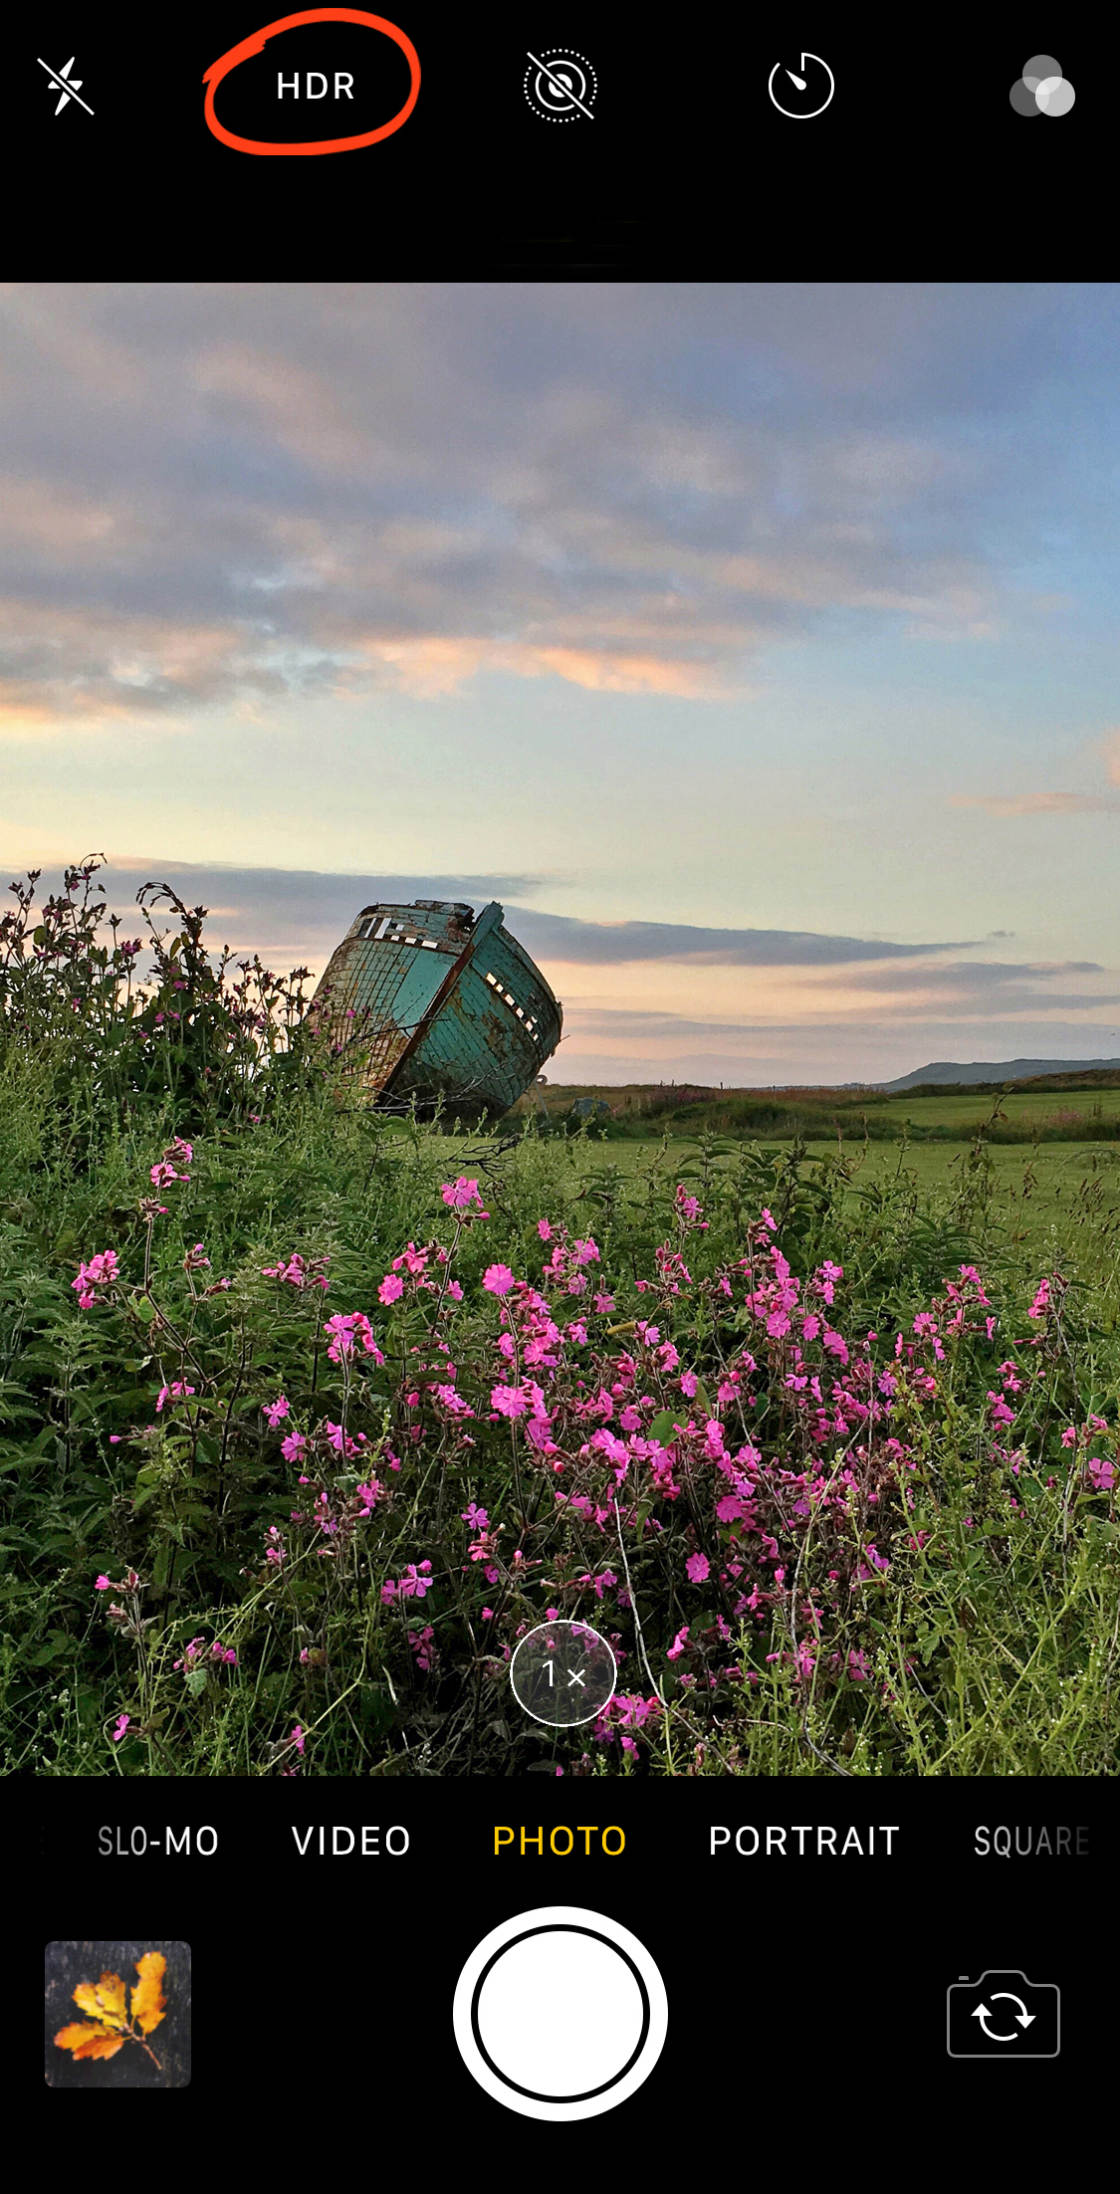
5. Use HDR To Balance Your Exposure
HDR (high-dynamic range) blends the best parts of three separate exposures into a single photo.
So if you want to automatically provide a more balanced exposure when you're taking a picture in a high-contrast scene, turn on the Auto HDR feature on your iPhone.
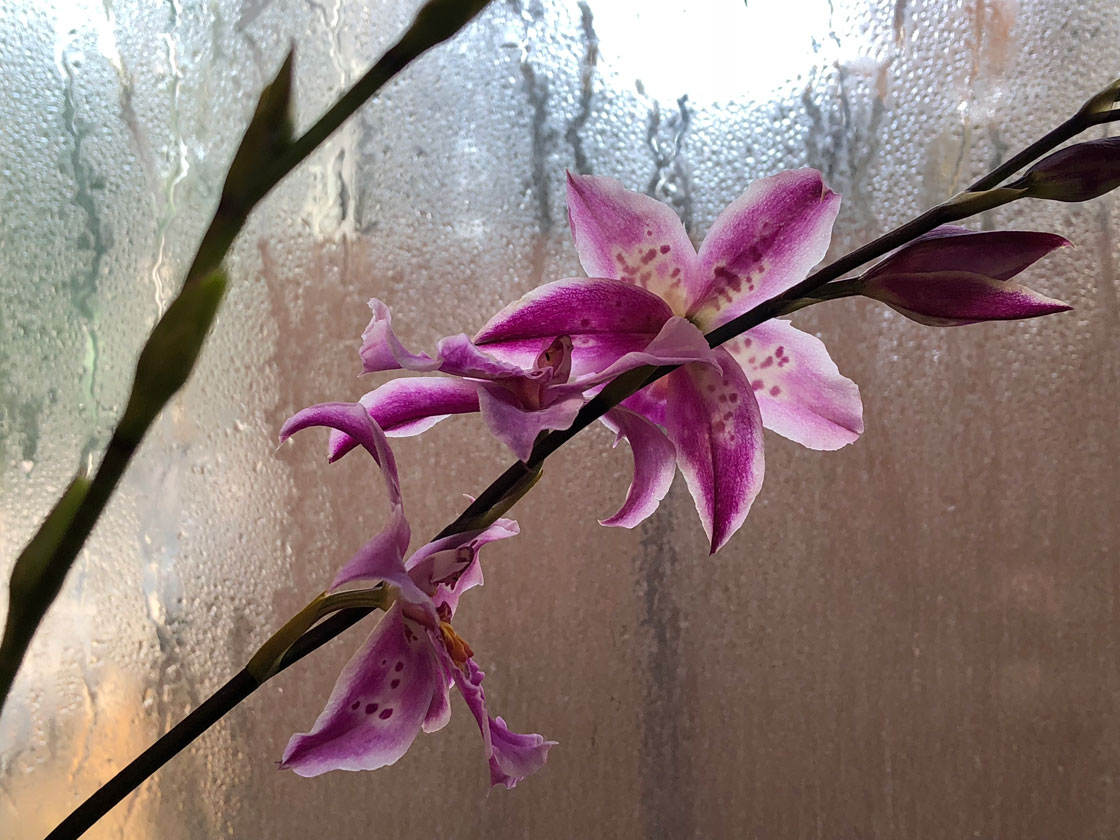
The photo above shows how the iPhone camera has exposed for the relatively dark subject, causing the bright highlights above the subject to be blown out, capturing no detail in that region of the photo.
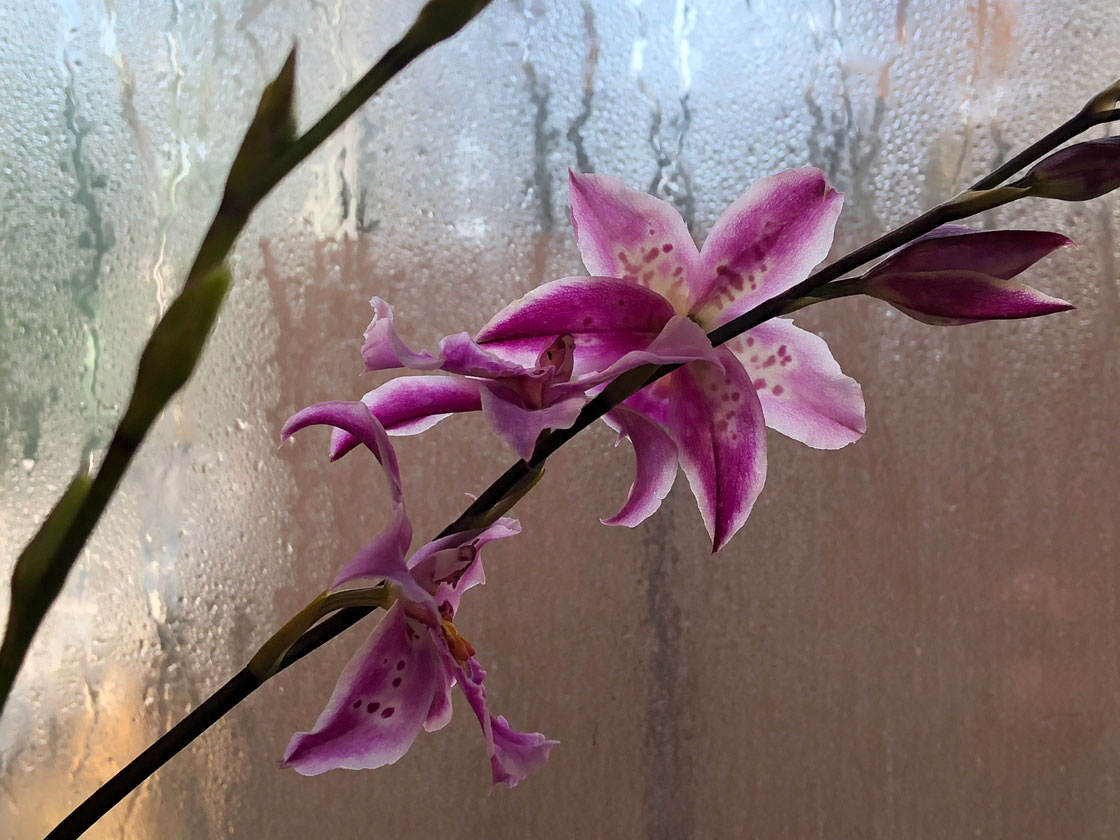
Compare this with the photo below, where HDR has been used. The iPhone automatically took three photos in quick succession and used the best-exposed regions of each photo to create a single image which has a much more balanced exposure and no lost detail.
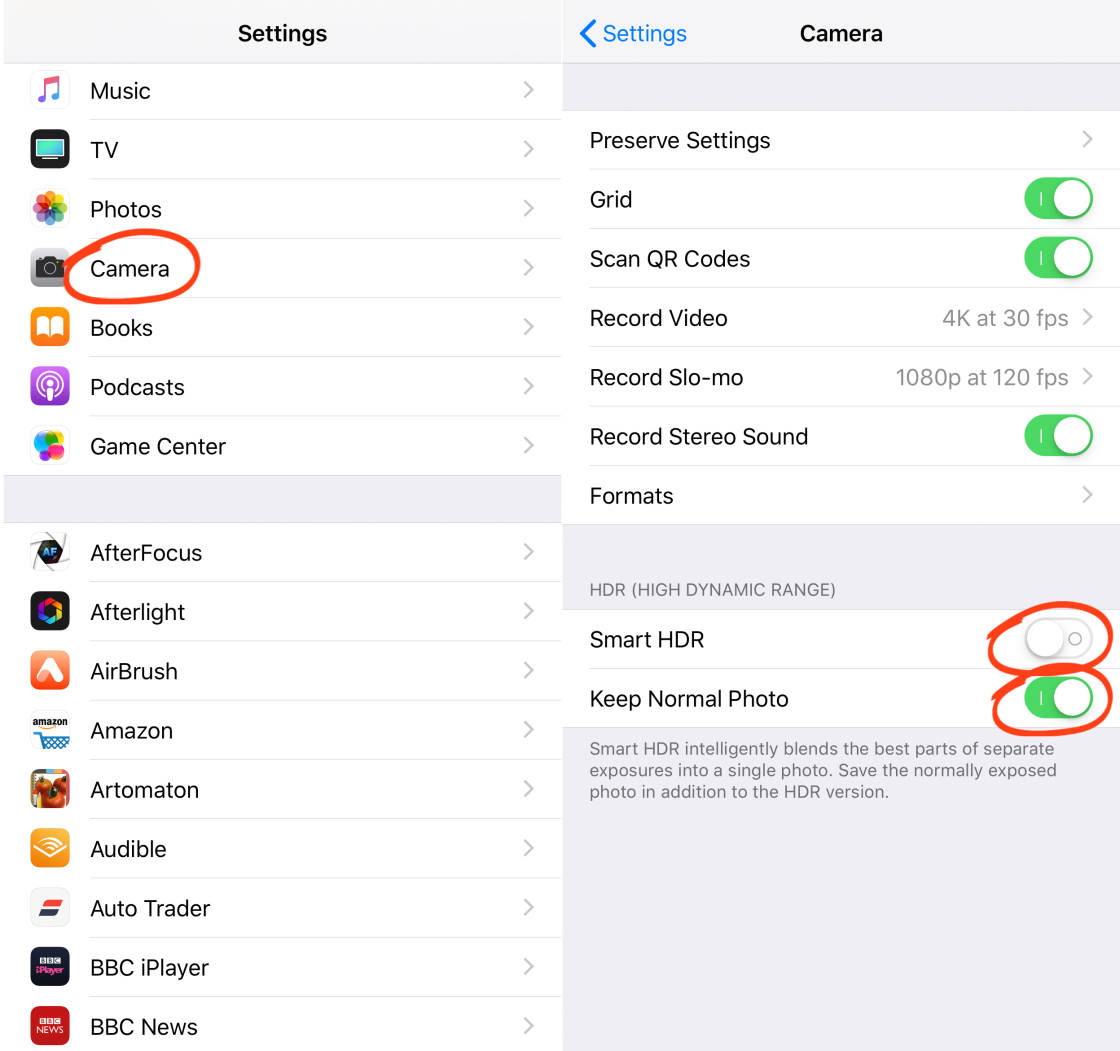
Here's how to enable HDR:
- Go to the Settings app and select Camera.
- Scroll down and you will see a section for HDR.
- Switch off Smart HDR (Auto HDR on older iPhones).
- Switch on the Keep Normal Photo option.
Now open the Camera app. Tap theHDRicon to ensure it appears without a line through it (which indicates HDR is on).
You can now take beautiful HDR photos with a balanced exposure throughout.
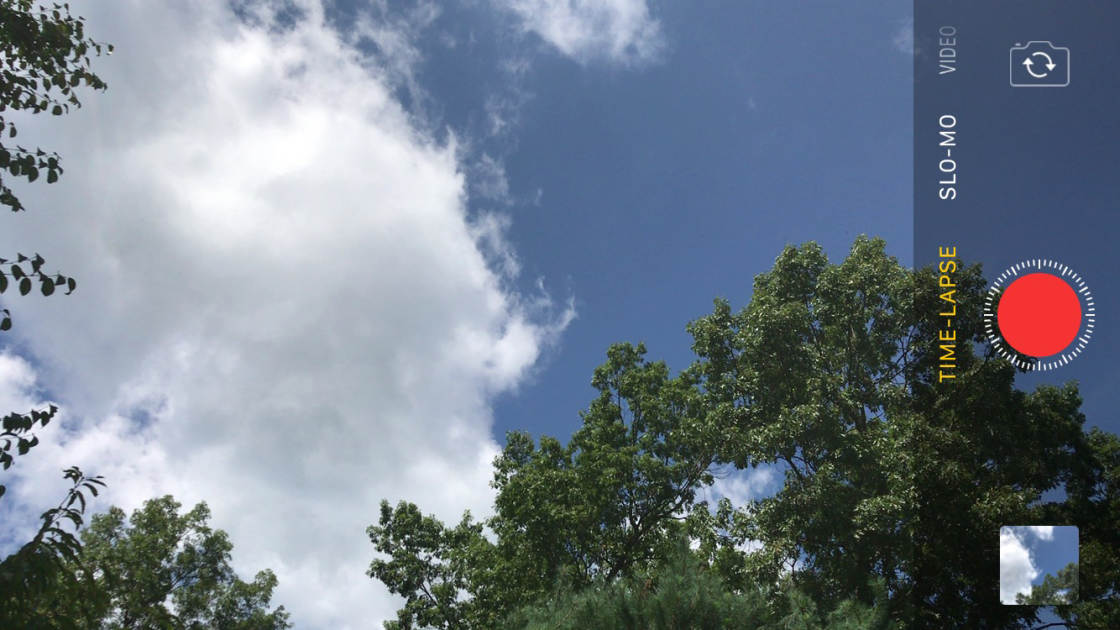
6. Condense A Long Event With Time Lapse
Have you ever wanted to create a video of a sunrise or sunset? Like, the whole thing — from darkness to daylight or dusk to dark? This is where iPhone Time Lapse mode can come in handy. And it's one of the more fun iPhone camera effects.
The entire process is quite simple, but you will need to keep your iPhone perfectly still, so get a tripod or place your iPhone somewhere it won't move.
- Find the ideal landscape you want to capture. Make sure you treat this part as if you were taking a picture. Be sure everything in the viewfinder is properly composed, allowing for the location of the sun's rising or setting.
- Swipe to Time Lapse mode and tap the red button to start recording.
- Once your event has ended (e.g. the sun has set or risen), press the shutter button again to stop the time lapse.
Time Lapse can be used on anything you want, not just sunrises and sunsets.
For instance, you could attach your iPhone to the dashboard of your car and record your daily commute to work.
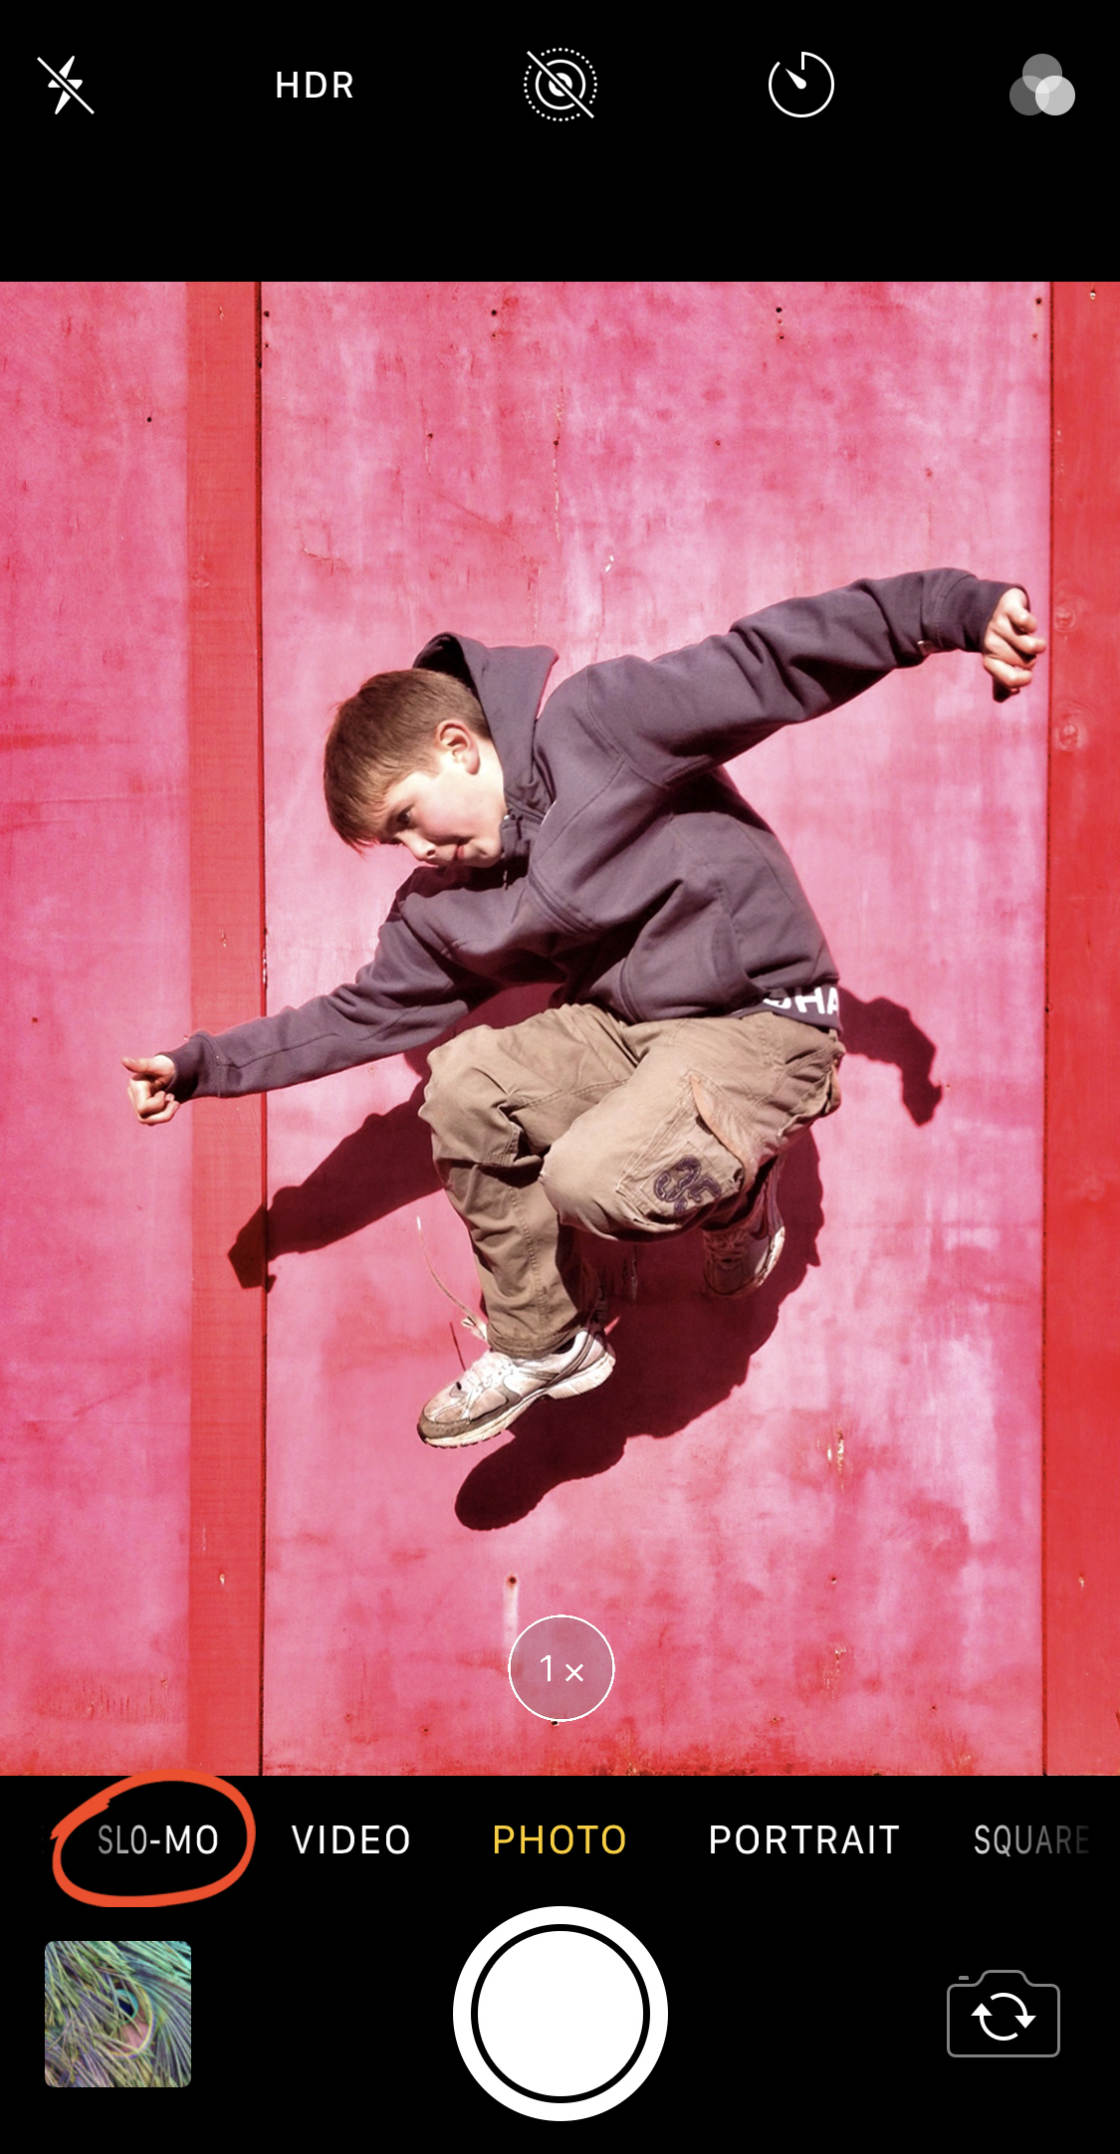
7. Use Slo-Mo To Highlight Movement
When you want to emphasize movement and really show the details behind some motion, the Slo-Mo feature is what you need.
To begin recording, open the Camera app and swipe to Slo-Mo.
Then start recording just like you would any video. With Slo-Mo, however, you're shooting video with more frames per second. This way, you can slow down specific parts later.
Here's how to edit your Slo-Mo video:
- Launch the Photos app.
- Find the Slo-Mo video you want to edit.
- Tap the Edit menu button at the top of your screen.
- Look at the slow-motion portion of the video in the timeline, represented by some "sliders" to the left and right.
- Drag these sliders to the points where you want the video to move in and out of slow motion.
- Once you're happy with your selections, tap Done.
Whenever you want to record a video, consider Slo-Mo to emphasize certain parts. For instance, if you're recording your child or pet running, maybe you will want to slow it down when they take a leap over a puddle to emphasize that athletic action.
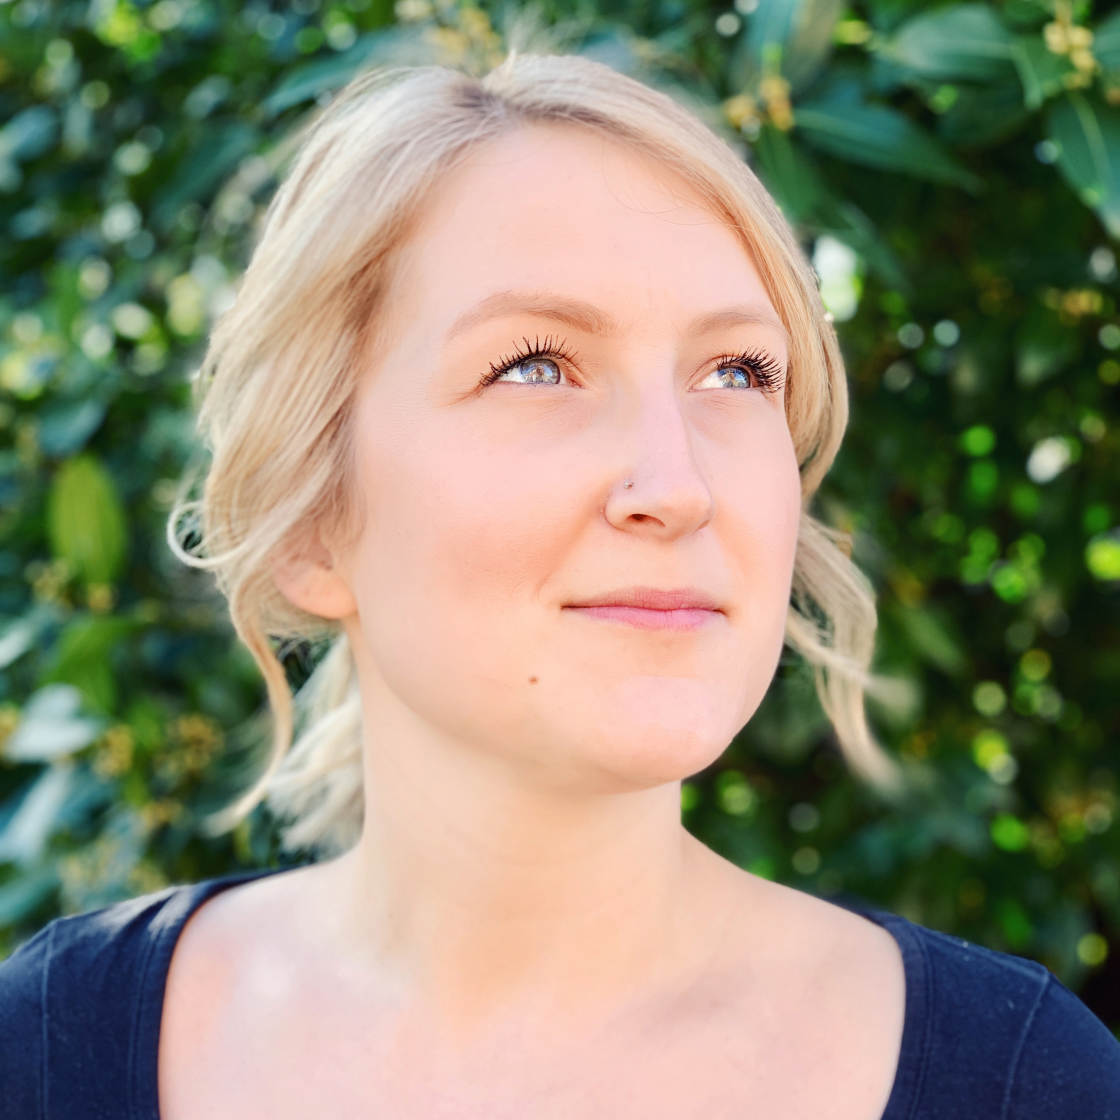
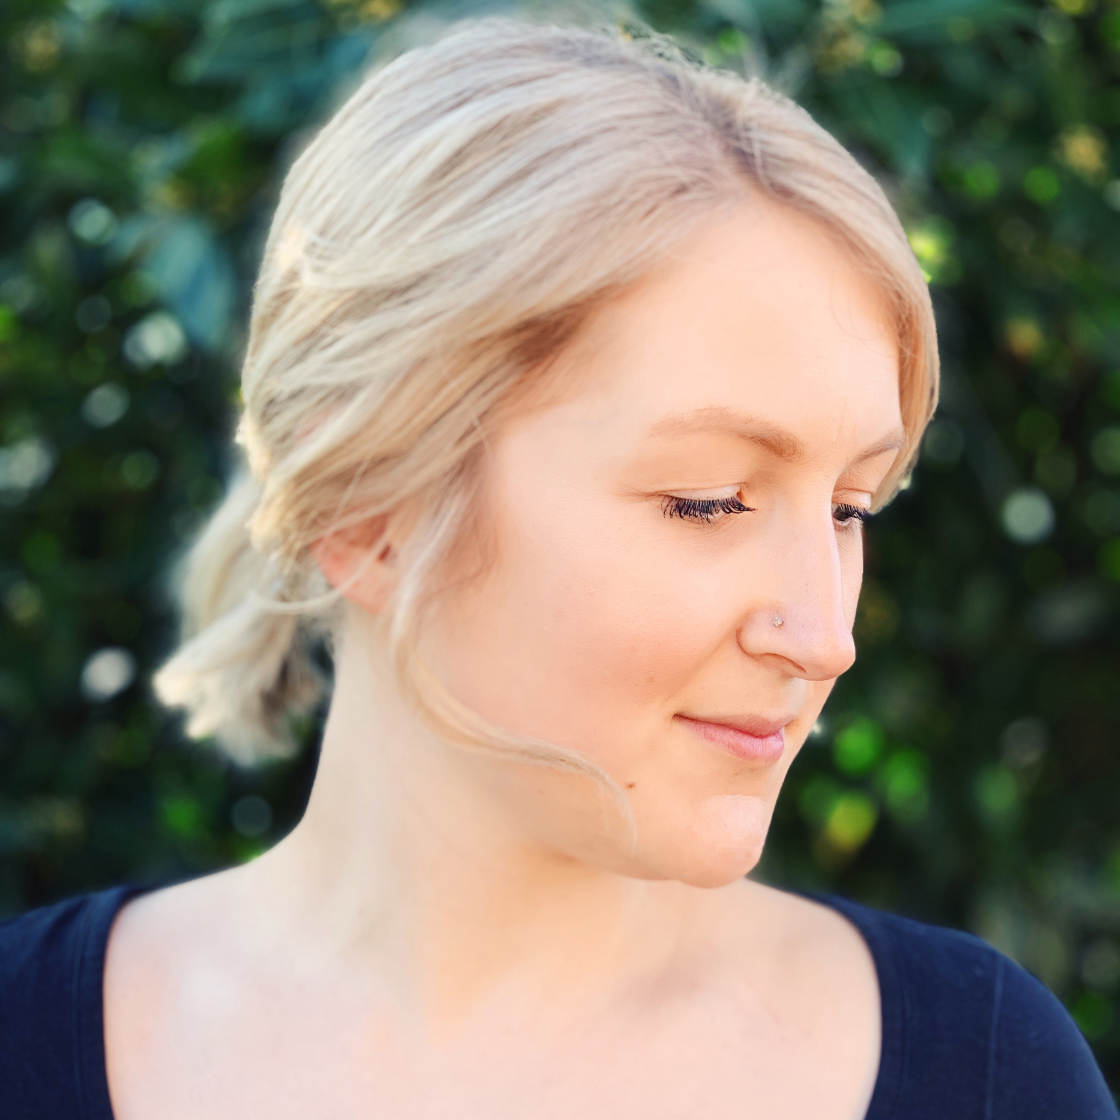
8. Create Beautiful, Professional Portraits
If you have an iPhone 7 Plus, 8 Plus, X, XS, XS Max or XR, you can use iPhone Portrait Mode to capture beautiful portraits with a blurred background.

There are a few things to remember to make sure you get the best results, however.
Keep The Proper Distance From Your Subject
When you open the Camera app and swipe to Portrait mode, an on-screen prompt tells you whether you're at an acceptable distance or not. If you're too close or too far away, the camera lets you know.
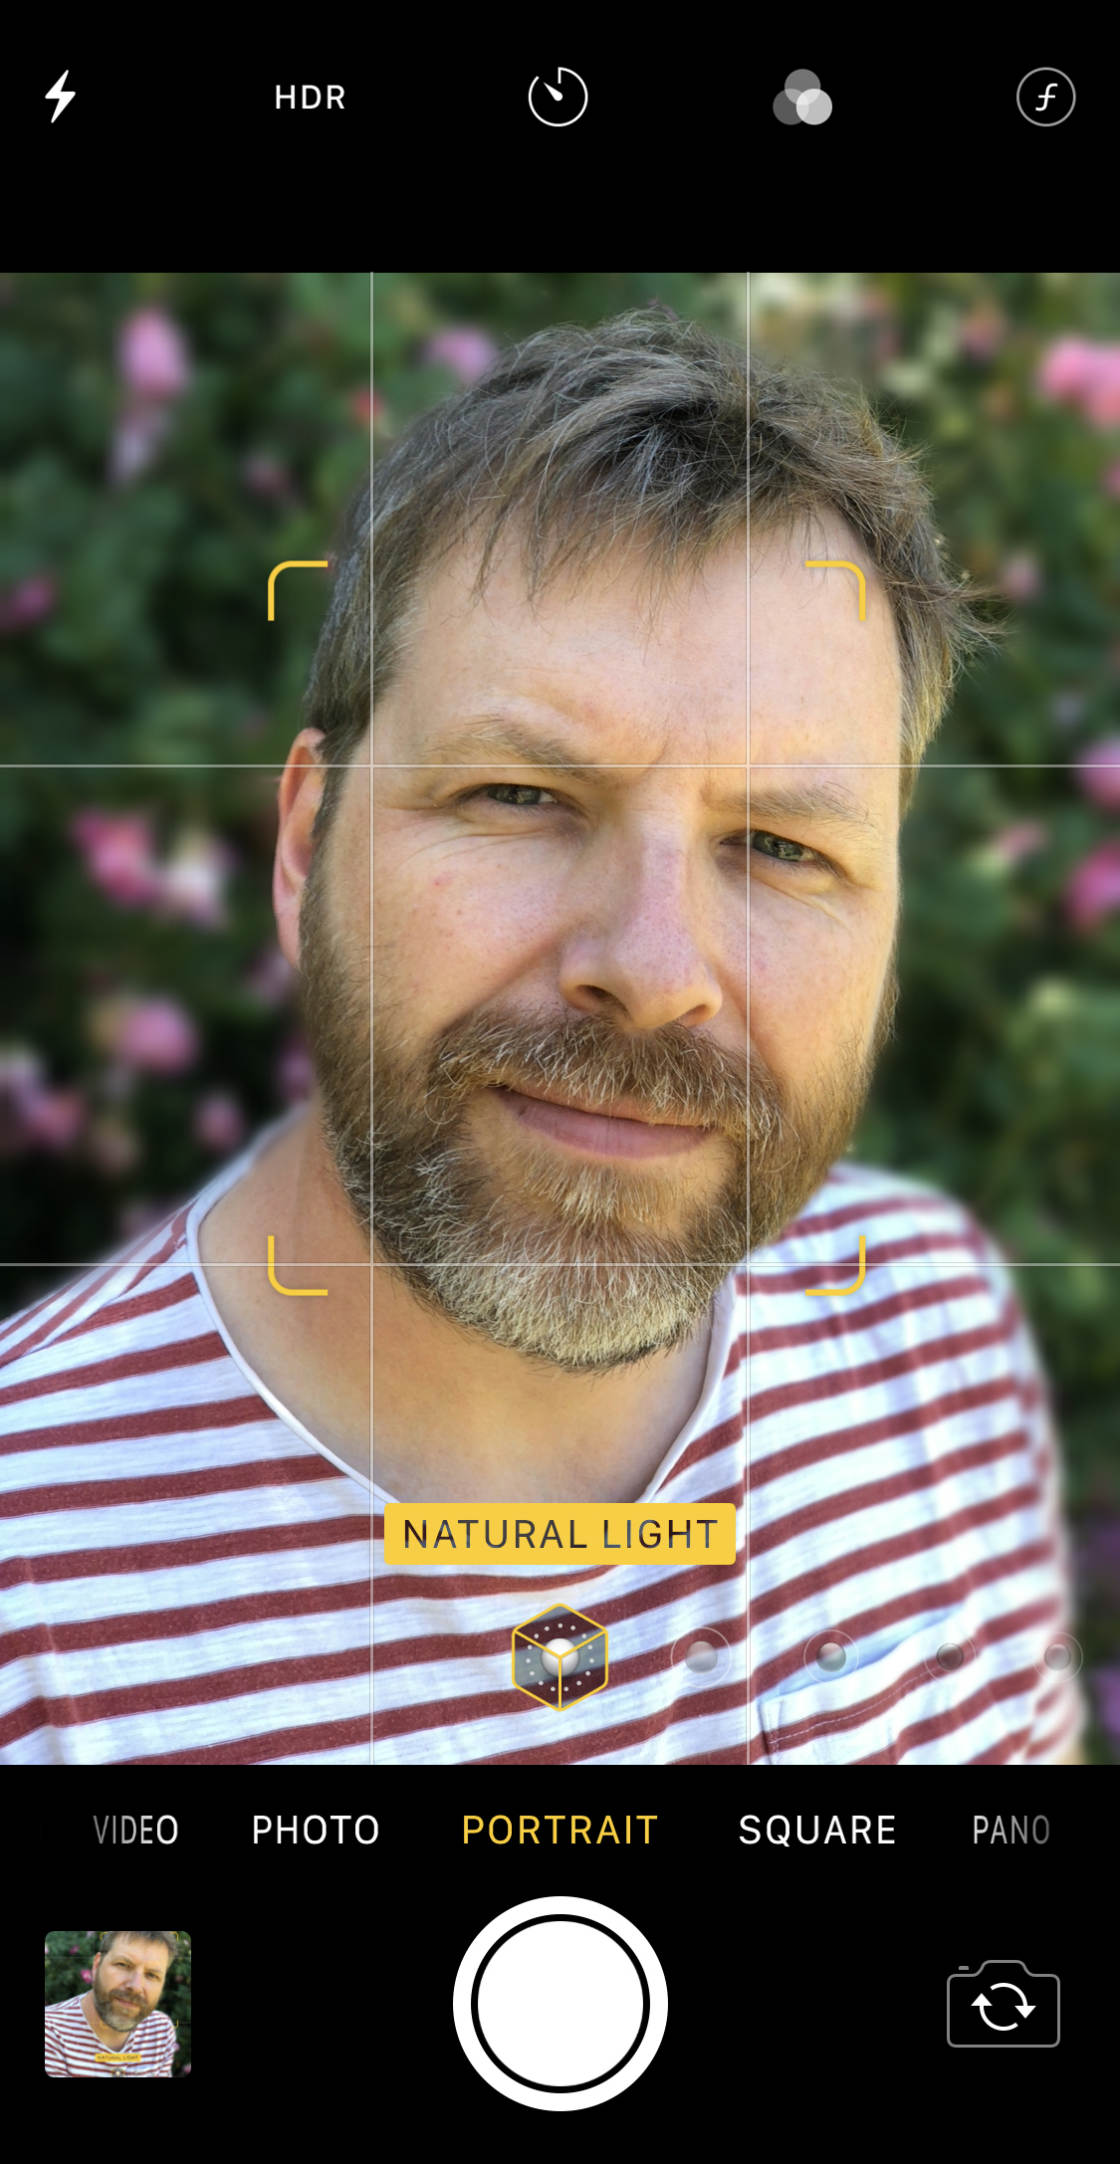
When you see Natural Light in yellow at the bottom of the screen, Portrait Mode is ready.
Keep It Simple
Whatever you're taking a picture of — a person, your pet, an inanimate object — keep it simple. If your subject is complicated — let's say they have strands of hair sticking out in all directions — some of that hair may blend into the background when that was not your intention.
Pay particular attention to the edges of what you want to be in focus. If you don't like what you see, move around a bit (closer or farther away) until you get the look you want.
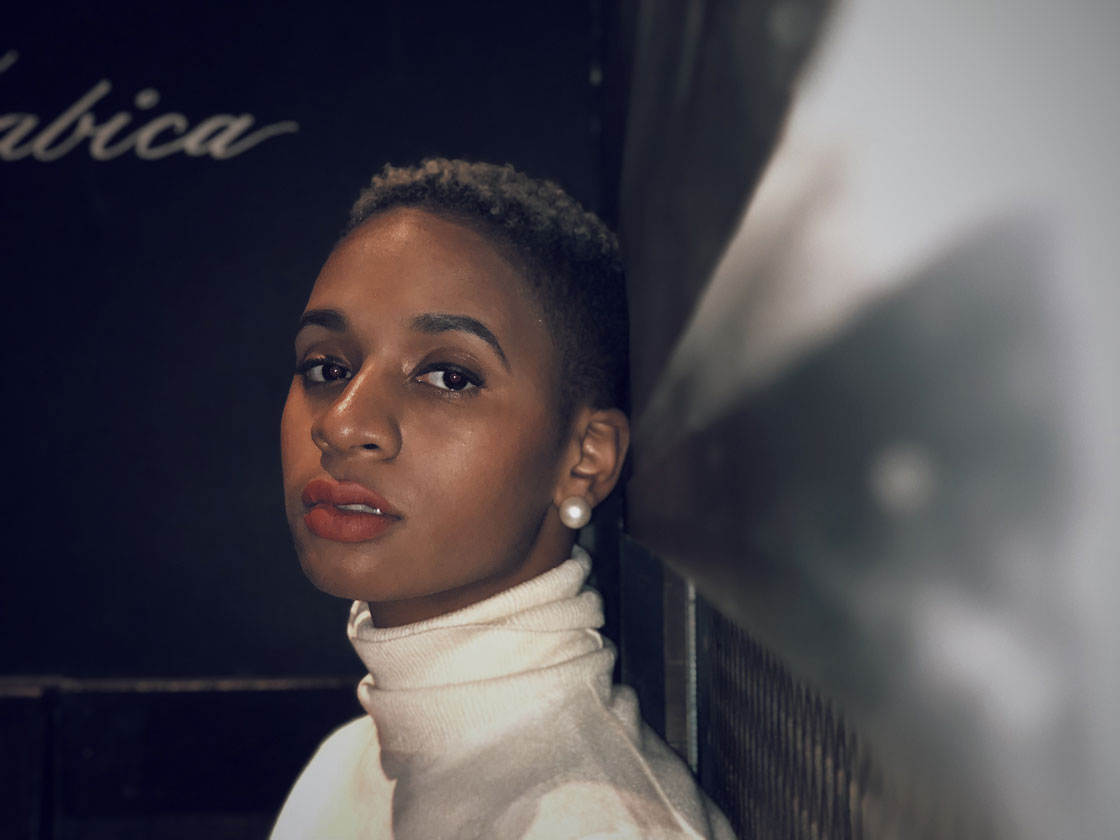
Add Some Light With Portrait Lighting
Portraits generally need plenty of light for the best results. When you don't have as much light as you would like, you can always fall back on Portrait Lighting.

In Portrait Mode, you can change the lighting to make your portrait image even better. Portrait Lighting produces the effects of real studio lighting based on fundamental photographic principles using depth‑sensing cameras and facial mapping.
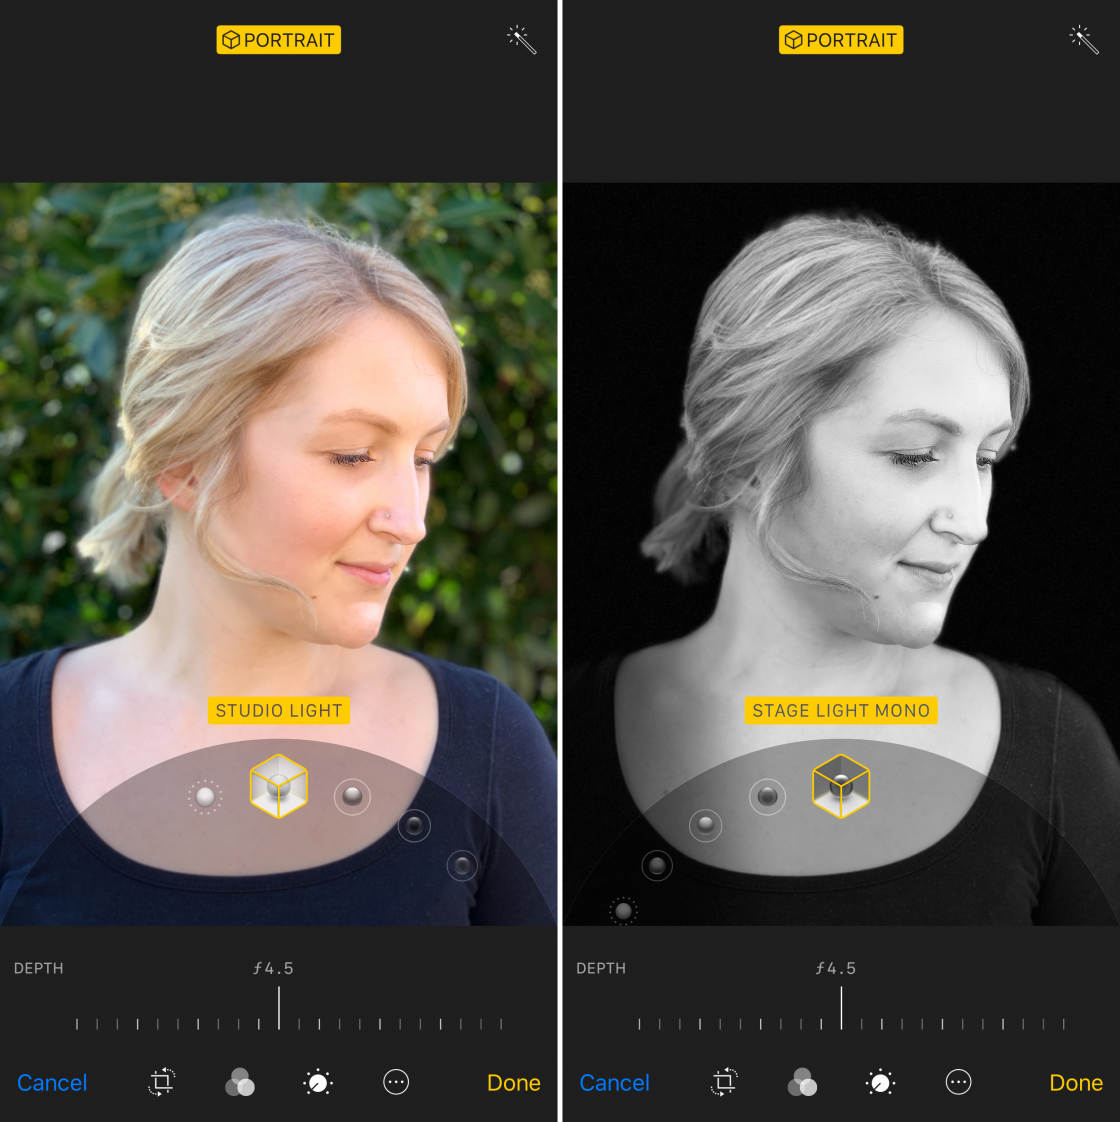
There are five available options:
- Natural Light is the best-case scenario for your perfect portrait. Find a well-lit area and you're well on your way to getting great results.
- Studio Light is the subtle solution when you need just a bit more light on your subject's face.
- Contour Light adds some dramatic shadows with highlights and lowlights.
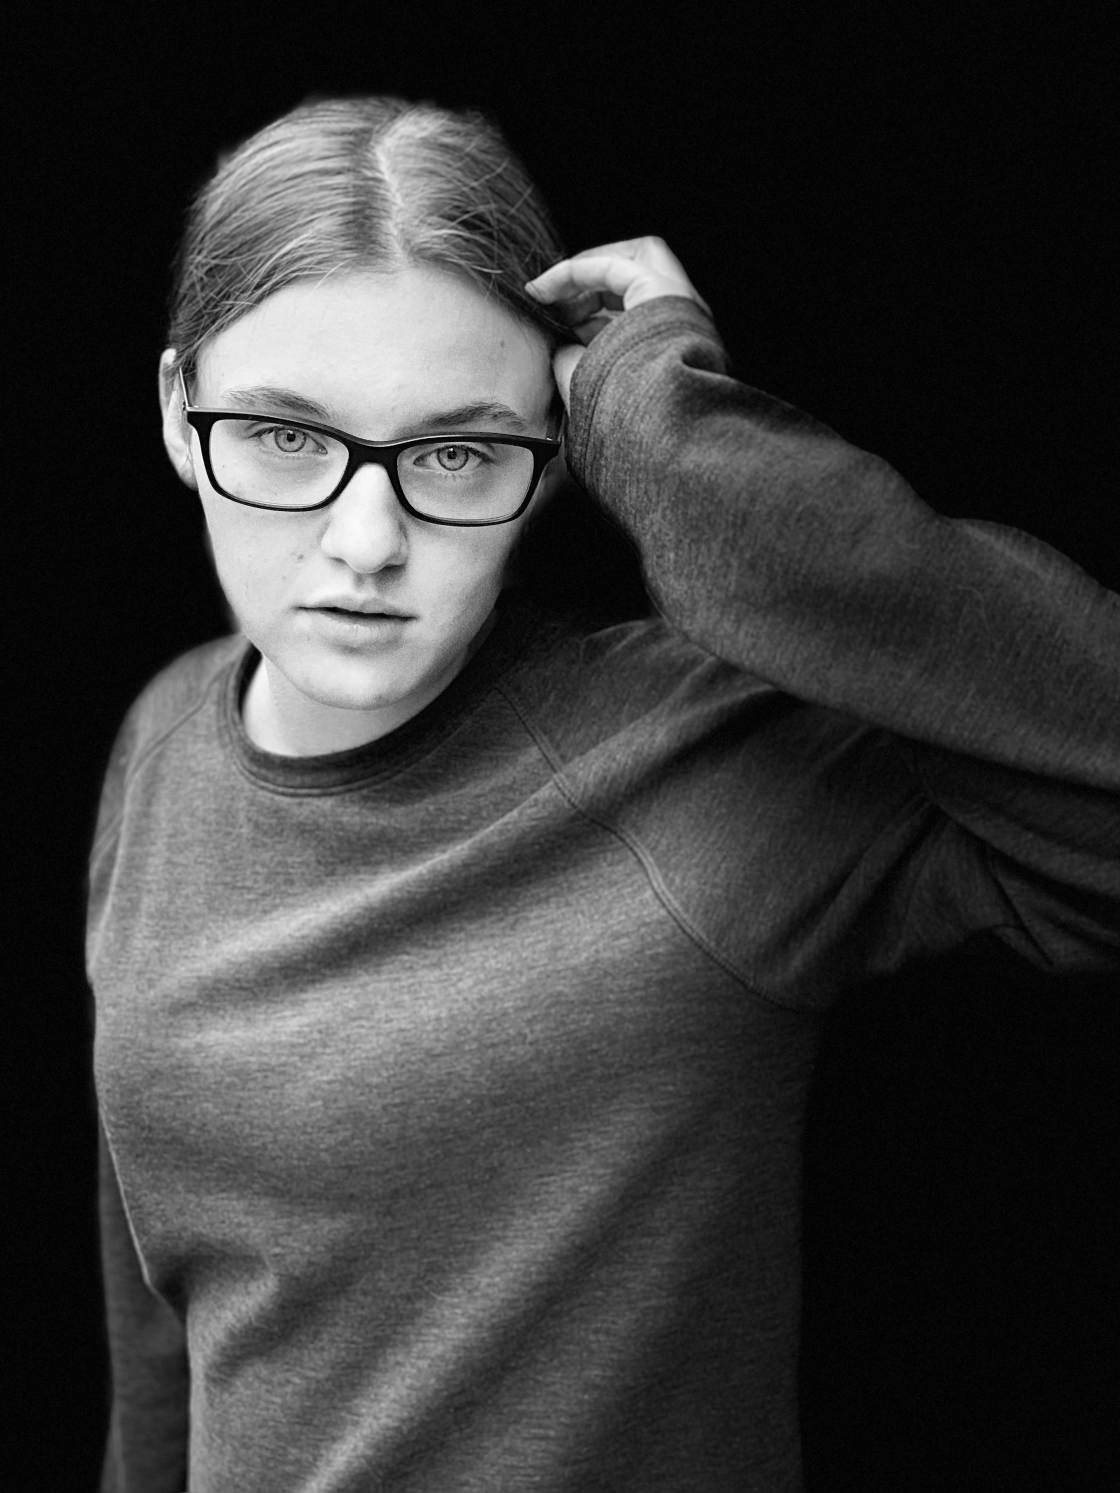
- Stage Light highlights your subject's face against a deep-black background.
- Stage Light Mono is simply the black-and-white version of Stage Light.
Portrait Lighting can be applied before or after you take a Portrait Mode image.
Note that Portrait mode and Portrait lighting aren't available on the iPhone 8 camera, iPhone 7 or older.
9. Capture The Whole Scene With Pano
The iPhone camera is already a wide-angle lens by design. But when it just isn't wide enough to capture everything you want from left to right, try Pano Mode to include it all.

Open the Camera app and swipe to Pano mode.
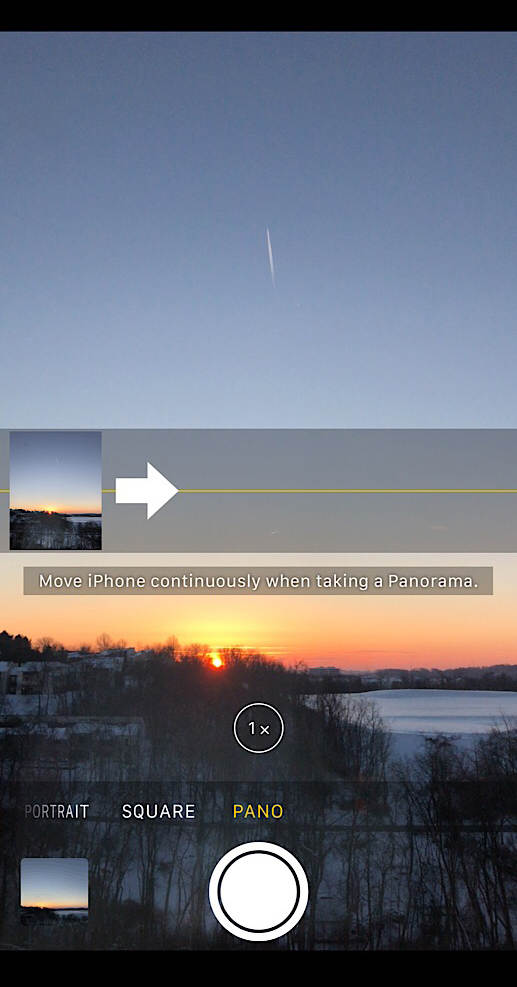
You'll notice a guide bar in the middle of the screen to help you take your photo.
If you want to start your photo from the left, be sure the arrow is pointing to the right. If you want to start from the right, tap the arrow to change its direction.
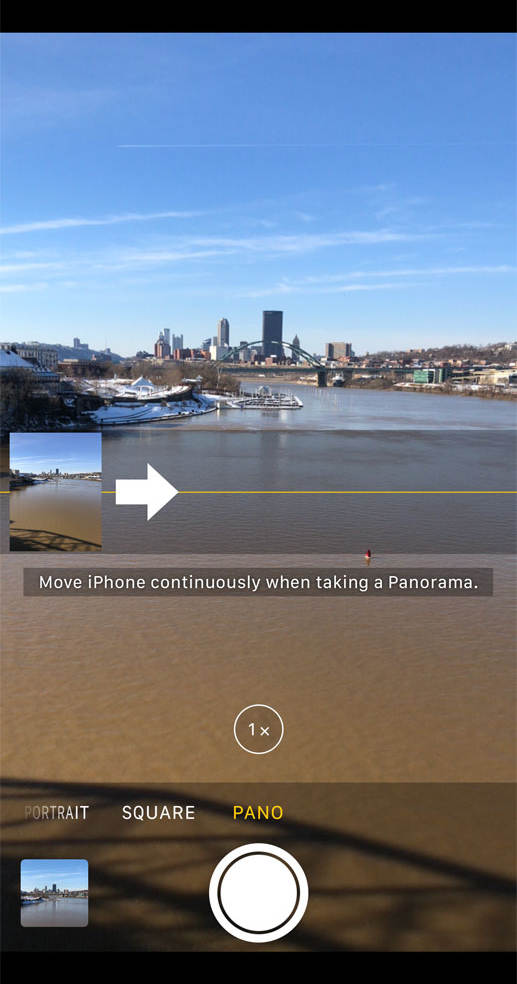
Tap the shutter button and slowly but steadily move your camera along the straight yellow line from one side of your shot to the next until you're done. You'll want to move your iPhone continuously along this line without stopping.
Try to keep the arrow on the yellow guide bar. This is easier said than done. It will be much easier to get a great image if you have a steady hand as you're moving.
Try a vertical pano to capture something really tall, like a tree, a building, or a waterfall.
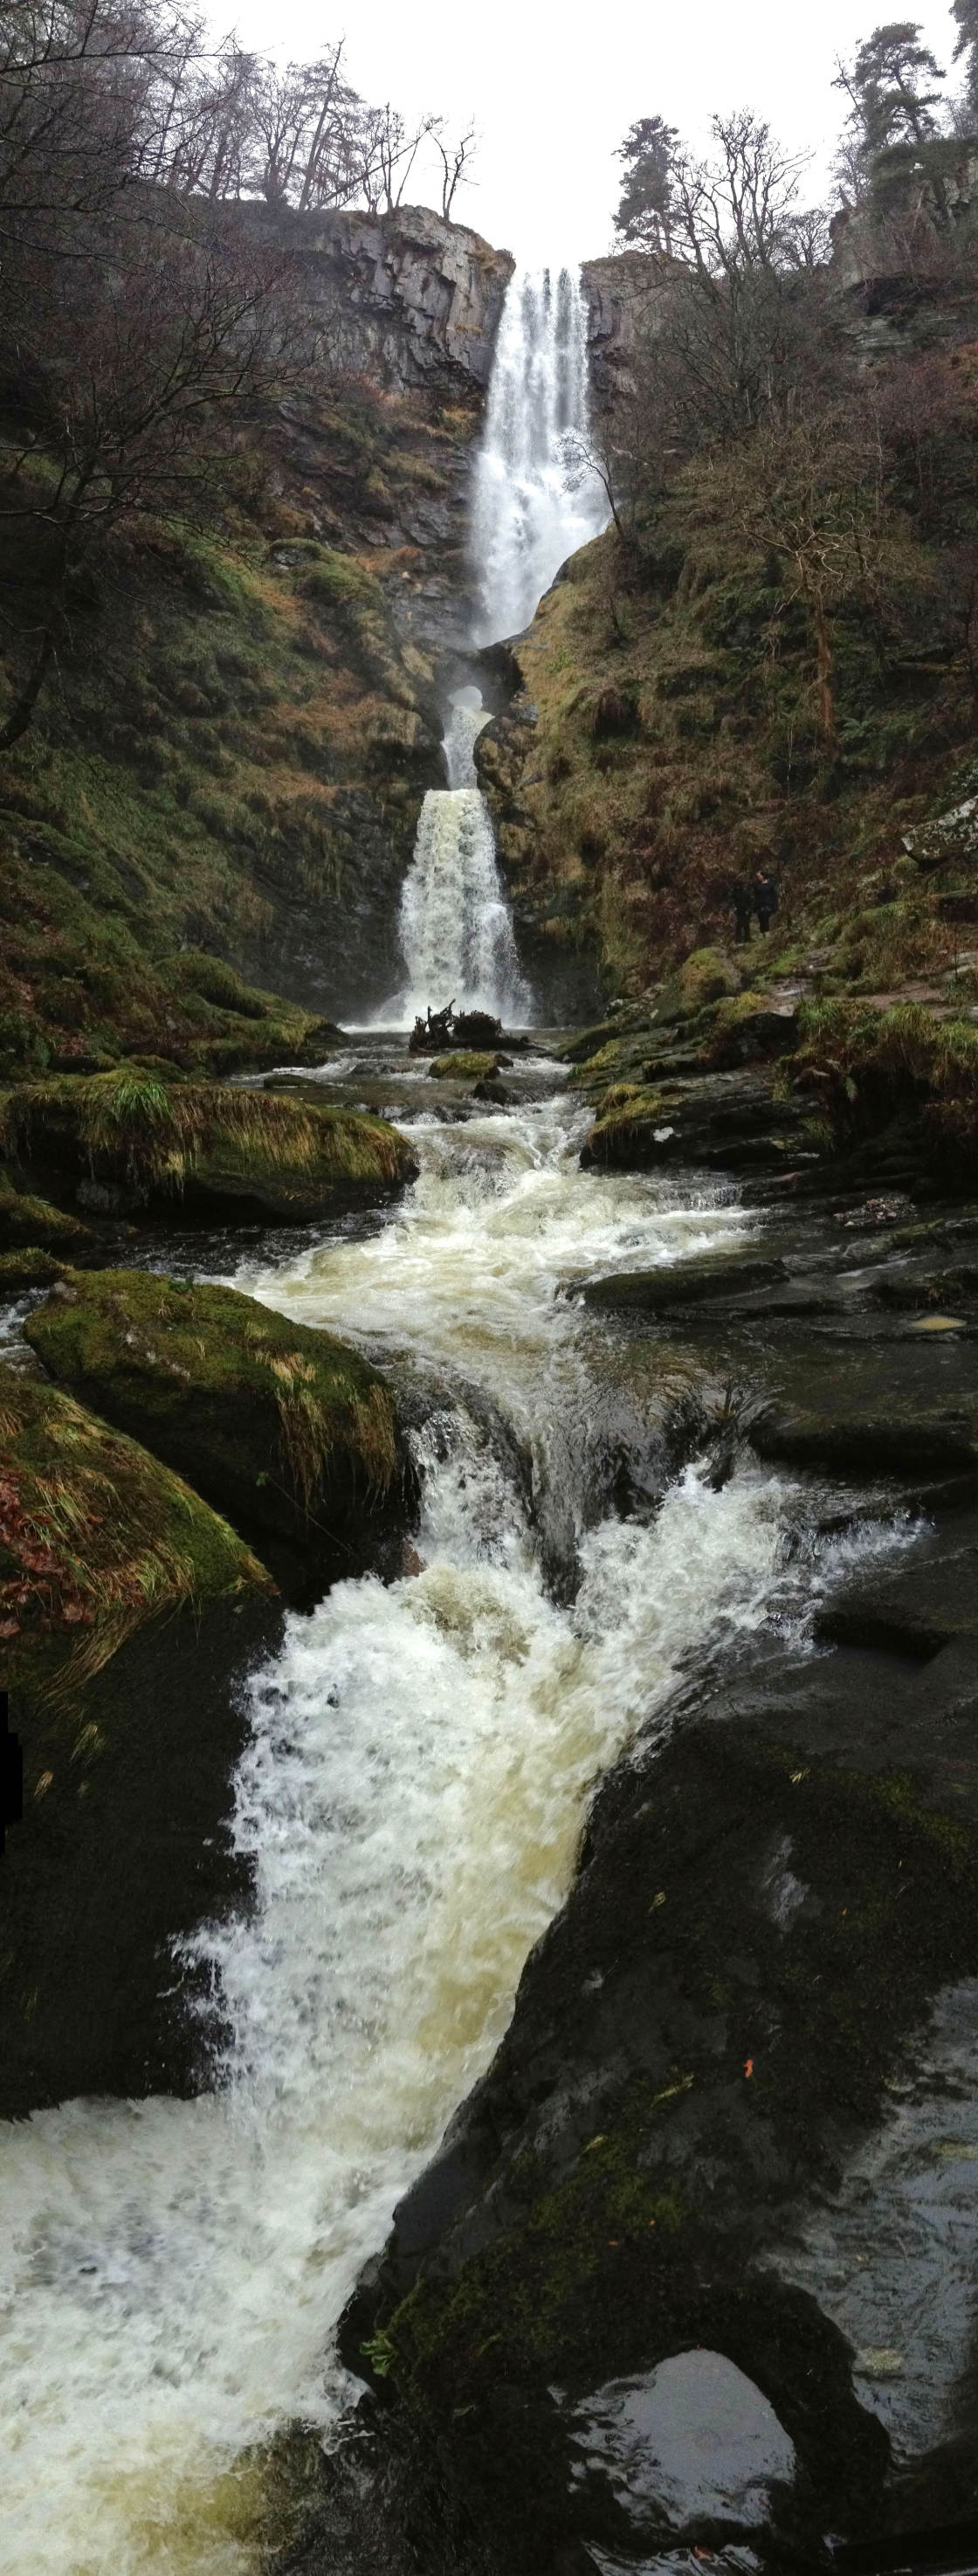
The same principles mentioned above apply, just turn your camera to the landscape position and scan vertically.
How To Use Photo Filters On Iphone
Source: https://iphonephotographyschool.com/iphone-camera-effects/
Posted by: fontundeng1977.blogspot.com
0 Response to "How To Use Photo Filters On Iphone"
Post a Comment